Understand the layer system and terrain properties.
Terrain & Layers
The Layer System
The map editor paints on stacking layers, each with a different purpose:
Floor (Ground Layer)
The base terrain — grass, dirt, sand, snow, water, stone, lava, etc. Each floor tile has:- Biome type — which biome it belongs to (Plains, Forest, Desert, etc.)
- Variant — specific visual style within that biome
- Walkability — whether characters can walk on it
- Elevation — height value for creating cliffs and raised terrain
- Floor tileset — the ground sprite, with autotile support
- Wall tileset — the cliff face sprite used when adjacent tiles have different elevations
Object Sublayers (1 – 4)
Objects paint onto four stacking sublayers so decoration reads correctly in isometric view:| Sublayer | Typical Use |
|---|---|
| 1 — Mid | Bushes, fences, barrels, small rocks, signposts, low walls |
| 2 — Upper | Trees, buildings, pillars, statues, tall walls |
| 3 — Fringe | Overhanging details, eaves, hanging signs, banners |
| 4 — Fringe 2 | Top-most accents layered above Fringe (rooftop ornaments, floating particles) |
The Objects palette includes a sublayer selector (with an Auto option that picks 1 or 2 based on the object's definition). Each sublayer has its own visibility toggle in the layer panel.
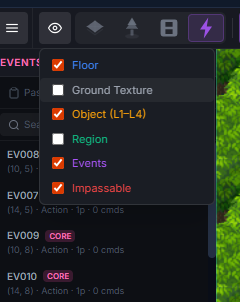
Events Layer
Interactive trigger points — NPC dialogues, cutscene triggers, teleport zones, treasure chests. These are invisible in-game and activate when a player walks onto them or interacts.Tile Properties
Each terrain tile can be configured:
| Property | Description |
|---|---|
| Biome | One of 15 types: Plains, Forest, Desert, Swamp, Tundra, Mountain, Jungle, Savanna, Beach, Ocean, River, Lake, Volcanic, Mushroom, Corrupted |
| Walkable | Can characters walk here? |
| Elevation | Height value — differences between adjacent tiles create cliff edges automatically |
| Variant | Visual variation (e.g., grass type 1, grass type 2) |
Placing Objects
When placing objects on Layer 1 or Layer 2:
- Multi-tile objects — objects can span 2×2, 3×3, or any custom size
- Passage grid — each cell of a multi-tile object can be set to:
- Display options — ladder, bush (character partially hidden), draw-on-top
- Animations — animated objects use framesheet sprites that play in a loop
Resizing Placed Objects
Placed objects can be resized directly on the map without changing the source object definition.
- Select an object on Layer 1 or Layer 2 so the selection box appears.
- Drag the corner resize grip to scale the object's footprint in tiles. The object's width and height (in tile units) change independently on the X and Y axes, so you can stretch a 2×2 rock into a 4×3 boulder without swapping art.
- The cursor flips to a diagonal-resize icon when it's over the grip, so you won't accidentally paint while resizing.
- The original object definition is untouched — only the placed instance on this map is resized. Paint another copy anywhere on the map and it goes back to the definition's default size.
- Resize respects layer order: Layer 1 stays below Layer 2, and the passage grid scales with the new footprint.
Autotile System
When you paint terrain, the editor automatically selects the correct tile variant based on neighboring tiles:
- Grass next to water gets a natural shore-edge variant
- Paths next to grass get correct border pieces
- Cliff edges auto-generate when adjacent tiles have different elevations