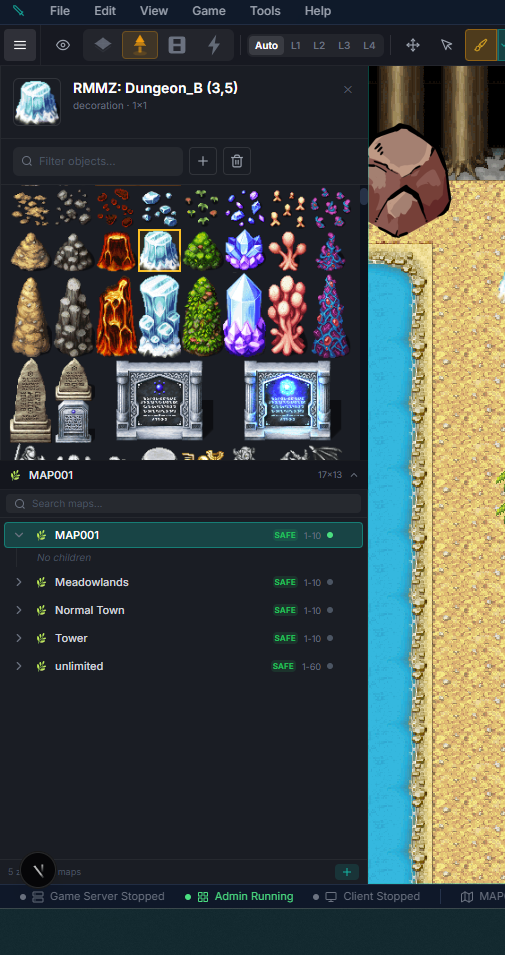
The visual isometric map painting tool.
Zone Editor
The zone editor is where you build every location in your game — towns, dungeons, forests, deserts, and more. It's a visual map painter with an isometric perspective, similar to RPG Maker but for MMO-scale worlds.
Creating a Zone
The app opens in Zones by default. To add a map, use Create first zone, the + button at the bottom of the left map browser, or right-click empty space in the map tree and choose New Root Map. Then configure the zone properties:
| Property | Description |
|---|---|
| Name | Display name shown to players (e.g., "Whispering Woods") |
| Zone Type | Overworld, interior, dungeon, or instance |
| Default Biome | The base terrain type for this zone |
| PvP Rules | Safe, free-for-all, guild-war, faction, or duel-only |
| Level Range | Suggested minimum and maximum player level |
| Chunk Range | X/Y boundaries that define the zone's total size |
| BGM | Background music track |
| Combat BGM | Music that plays during combat encounters |
| Ambient Sound | Environmental audio loop (wind, birds, water, etc.) |
Two Editor Modes
| Mode | Purpose |
|---|---|
| Map Edit | Paint terrain, place objects, adjust elevation |
| Event Mode | Place and configure interactive triggers, dialogues, and cutscenes |
Switch between modes using the toggle in the toolbar.
Painting Tools
| Tool | Shortcut | Description |
|---|---|---|
| Hand | H | Pan the map view by clicking and dragging |
| Pencil | P | Paint individual tiles one at a time |
| Rectangle | R | Drag to fill a rectangular area |
| Circle | C | Drag to fill a circular area |
| Flood Fill | F | Fill all connected tiles of the same type |
| Eraser | E | Remove tiles or objects from the current layer |
| Eye Dropper | I | Click a tile to copy its properties |
Brush Options
- Brush size — adjustable from 1 to 16 tiles
- Autotile mode — the editor automatically picks the correct edge/border tile variant so biome transitions look natural
- Elevation painting — set terrain height to create cliffs and valleys
- Shift + paint — locks autotile to the exact source tile (no neighbor auto-connect rewrite). Useful for placing water, walls, or fences that should ignore surrounding terrain.
Right-Click Tools
Right-click is reserved for quick-capture operations on the map:
| Input | Action |
|---|---|
| Right click | Eye-drop the tile (and objects) under the cursor into the active brush |
| Right drag | Marquee-copy a full-stack area (tile layers + object layers L1/L2/Fringe/Fringe2) |
| Shift + Right click | Capture a single-tile stack |
Captured selections paste with the full stack intact. The cursor shows a ghost preview of what will be stamped.
Tileset & Object Palettes
The palette on the right shows tiles organized by biome and objects organized by category. Both panels support marquee drag-select:
- Drag across multiple tiles to build a pattern brush that stamps the exact shape you selected, even across different tileset sheets
- Drag across multiple objects to build a multi-object brush that places all of them as a group
- Click empty space in the palette to clear the current brush/selection
- Selected cards are highlighted with a bright cyan border
Radial Context Menu (Event Mode, Touch-Friendly)
When you're in Event Mode, long-press (touch) or right-click a tile to open a radial context menu with the event actions laid out around the cursor. It makes tablet editing practical and keeps desktop hands close to the cursor.
- On empty tiles the menu offers creation shortcuts: Core Event, Portal, NPC, Spawn, Monster, Chest, Sign, Trigger, Light, Resource.
- On an existing event, the menu switches to edit actions: Edit, Select, Rename, Copy, Delete (or a trimmed set for placed items: Edit / Select / Delete).
- Double-click an empty tile to create a default event, or an existing event to open its editor directly — no menu required.
Spray Brush & Shift Modifiers
Shift combines with most painting tools to change how the brush behaves:
- Shift + paint (Pencil / Rectangle / Circle) — spray mode. Tiles are placed with a feathered random pattern inside the brush footprint, perfect for scattering grass tufts, pebbles, or decals.
- Shift + Eyedropper / Right-click — capture a single tile stack (ignoring the marquee behaviour).
- Shift + stamp (after a pattern capture) — preserve the exact autotile bitmasks from the source region so water/wall/path patterns stamp verbatim instead of recalculating edges against their new neighbours.
Free-Position Object Placement
Objects can be placed either on the tile grid or at a sub-tile pixel offset:
- Grid mode (default) — objects snap to the tile they're dropped on.
- Free mode — objects keep a per-instance
offsetPxX / offsetPxYin pixels, letting you nudge a barrel a few pixels off-center or overlap two objects precisely. Toggle Free mode in the Objects palette, or hold Shift while placing to flip the current mode for that single stamp. - Paint mode on the Pencil switches between pencil (one tile per click) and brush (continuous paint while dragging).
Quick Property Edit Modes (Objects Palette)
The Objects palette has special edit modes that let you fix object metadata without opening the object definition:
| Mode | What It Edits | Left-click | Right-click |
|---|---|---|---|
| Passage | Per-cell passage grid | Cycle X → O → ☆ | Cycle backward |
| Ladder | Ladder flag (H) | Toggle on | Toggle off |
| Bush | Bush flag (B — character partially hidden) | Toggle on | Toggle off |
| Draw-on-top | Always-above flag (A) | Toggle on | Toggle off |
| Select | Multi-select for bulk delete | Click to add to selection | — |
Multi-tile group objects show a purple ring in the palette. Left-click selects the whole group; right-click opens a drag-selector so you can pick specific cells of the multi-tile footprint as your brush.
Copy, Paste, and the Pattern Brush
- Right-drag on the map creates a marquee that copies the complete tile stack — both floor sublayers plus all four object sublayers — into a Pattern Brush. The cursor shows the pattern's ghost so you can see what will stamp.
- Shift + Right-click captures a single-tile stack the same way.
- Ctrl+C / Ctrl+V copies and pastes the active selection, whether that's a tile region or a selected event.
- Click empty space in the tileset/object palette to clear the current pattern and return to the default brush.
Undo / Redo
Undo/redo is backed by a background web worker that stores XOR-compressed diffs of each stroke, so even huge fill operations can be reversed cheaply.
- Ctrl+Z undoes, Ctrl+Y (or Ctrl+Shift+Z) redoes.
- The history keeps up to 80 strokes. Each continuous drag counts as a single stroke, so dragging a long path uses only one slot.
- Redo is cleared as soon as you make a new edit, as expected.
View Mode, Parallax, and Day/Night Preview
- View mode toggle — switch between Isometric and Top-down rendering of the same map data. Useful for quickly laying out a town's footprint top-down before polishing it isometrically.
- Parallax background — attach a parallax image to the zone that scrolls behind the map as the player moves; configure its scroll speed per axis.
- Day/Night preview — preview the zone at any time-of-day without waiting for the in-game clock. Toggle the preview and drag the time slider to check how lighting, shadows, and ambient tint affect your art.
- Starting location — right-click a tile and choose Set as starting location (or use the toolbar action) to pick the spawn point new characters use when they first enter the world.
Performance
The editor uses an optional GPU-accelerated base scene renderer (PixiJS 8 / WebGL) for large worlds. Enable it with ?pixi=1 in the editor URL. Very large imported libraries (for example 30k+ RPG Maker MZ decorations) use row virtualization in the object panel to keep scrolling and panel-switching responsive.